Customer had an older PC, with a 20GB and a 30Gb HDD, and both were filling up fast.
She decides to get a 640Gb external USB drive to store her internet downloads.
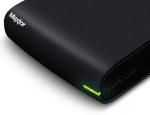
Its a Maxtor Basics with a 3.5″ SATA HDD.
She then decides to get a non-counterfeit version of XP.
This is when I get involved, and I convince her it would be a lot easier to place the 640Gb drive inside the PC and use it as the main windows drive.
Getting access to the 3.5″ HDD was a bit tricky. If I had known how to do it beforehand, I would have been able to dismantle it with barely a scratch on the external case.
Anyway, here’s how I did it (remember that this WILL invalidate your Maxtor warranty):
- Remove the small sticker at the back (near the power and USB plugs)
- Under the sticker is a screw. Remove it

- There are 2 long sides to the enclosure. One side has a matt finish, the other has a gloss finish, and has the word “maxtor” on it, and is near the light/LED.
- The side with the gloss finish has 10 tabs holding it to the rest of the enclosure (5 along the top, 5 along the bottom)
- This side can easily be popped off (1 tab at a time), with a flat screwdriver.
- This is probably the most difficult part: The plastic top and bottom parts of the enclosure are held clipped with hooked plastic tabs. These are always difficult to undo. You just need to start at one end, and use the screwdriver to work your way around the enclosure, popping (and hopefully not breaking) the tabs.
- Now you can remove the metal enclosure, undo a few screws, and there is you hard drive, ready to be put into a new PC (or if its faulty, replaced with a new drive).
Added 9/May/2009:
I’ve since re-assembled the external enclosure with another hard drive. It works great (except for the Maxtor label, which no longer reflects whats inside!)
